The Inspiration!
Happy Indian Independence day! First things first, Tiranga means 3 colors in Hindi. Indian flag is also synonymous with Tiranga because it has 3 colors in it. Saffron signifies courage and strength, white signifies peace and non-violence, and green represents the fertility and prosperity of the country. There is Ashoka Chakra (wheel of justice) in the middle representing the Dharma or justice.
My toddlers are beginning to understand the world around them, which in these COVID times is mostly their home, their parents and the activities at home. Ours is a multiracial family (I am Indian and my husband is American). It is clear to me that they will grow up here in US and there will be very few opportunities for them to go to India and have an authentic understanding of their Indian roots. So I am determined to do whatever it takes to instill some “Indian-ness” into them.
In trying to do that, I go back to my memories. Memories of the festivals like Vinayaka Chavithi, Diwali, Dussehra and of course the Independence day. Independence day takes me to my school days. The flag hoisting, the cultural programs, the patriotic songs, the distribution of candy in the school. Then we went back home to watch the Independence day parade in red fort on the TV with my parents, one of the few days where my Dad and Mom both had official holiday (both my parents were working, which was not very common in those days).
I want my kids to have their own memories, something to fall back on, when they find themselves in new places, new countries and new cultures or wherever else their life takes them. I want them to draw strength from their memories as I do everyday. My almost 3 yr old always helps me while I am baking and I used this project as an opportunity to make them understand the importance of the day, the importance of the colors of the flag. So here I am…
The challenges
These cookies are supposed to be handled very gently. You see, there is no fat in these cookies, nor any leavening agents. True to their name, they are made of just meringue, baked gently. The end product is this melt in your mouth, delicate darlings. Sounds simple right? But they are anything but simple. Meringue is the cooked or uncooked egg whites beat together with sugar until the egg whites become this white, shiny fluffy and stiff cloud like substance. While you are beating the egg whites, you are essentially introducing a lot of air into them. The sugar binds to the moisture in the egg whites and gives it a stiff structure. You can achieve this either by adding hot sugar syrup into the egg whites (Italian meringue), by cooking the egg whites and sugar on a bain-marie and later beating them (Swiss meringue) or by simply adding sugar to the egg whites (French meringue).
I used French meringue method here. You have to know just for how much time you need to beat your egg whites to get the perfect consistency. If the meringue underbeat and is runny, you cannot achieve a good piping consistency. If the egg whites are overbeaten, the cookies turn out very flat and dense and even before that the meringue might bleed out the moisture content.
Next important criteria is the baking time and temperature. Because the egg white is essentially proteins, its very finicky when exposed to high temperatures. So cook them at lowest temperatures possible, so slowly that they shouldn’t even know that they are being baked. Here I used 200°F and the plan was to bake them for an hour……which brings me to the next challenge, specific to me.
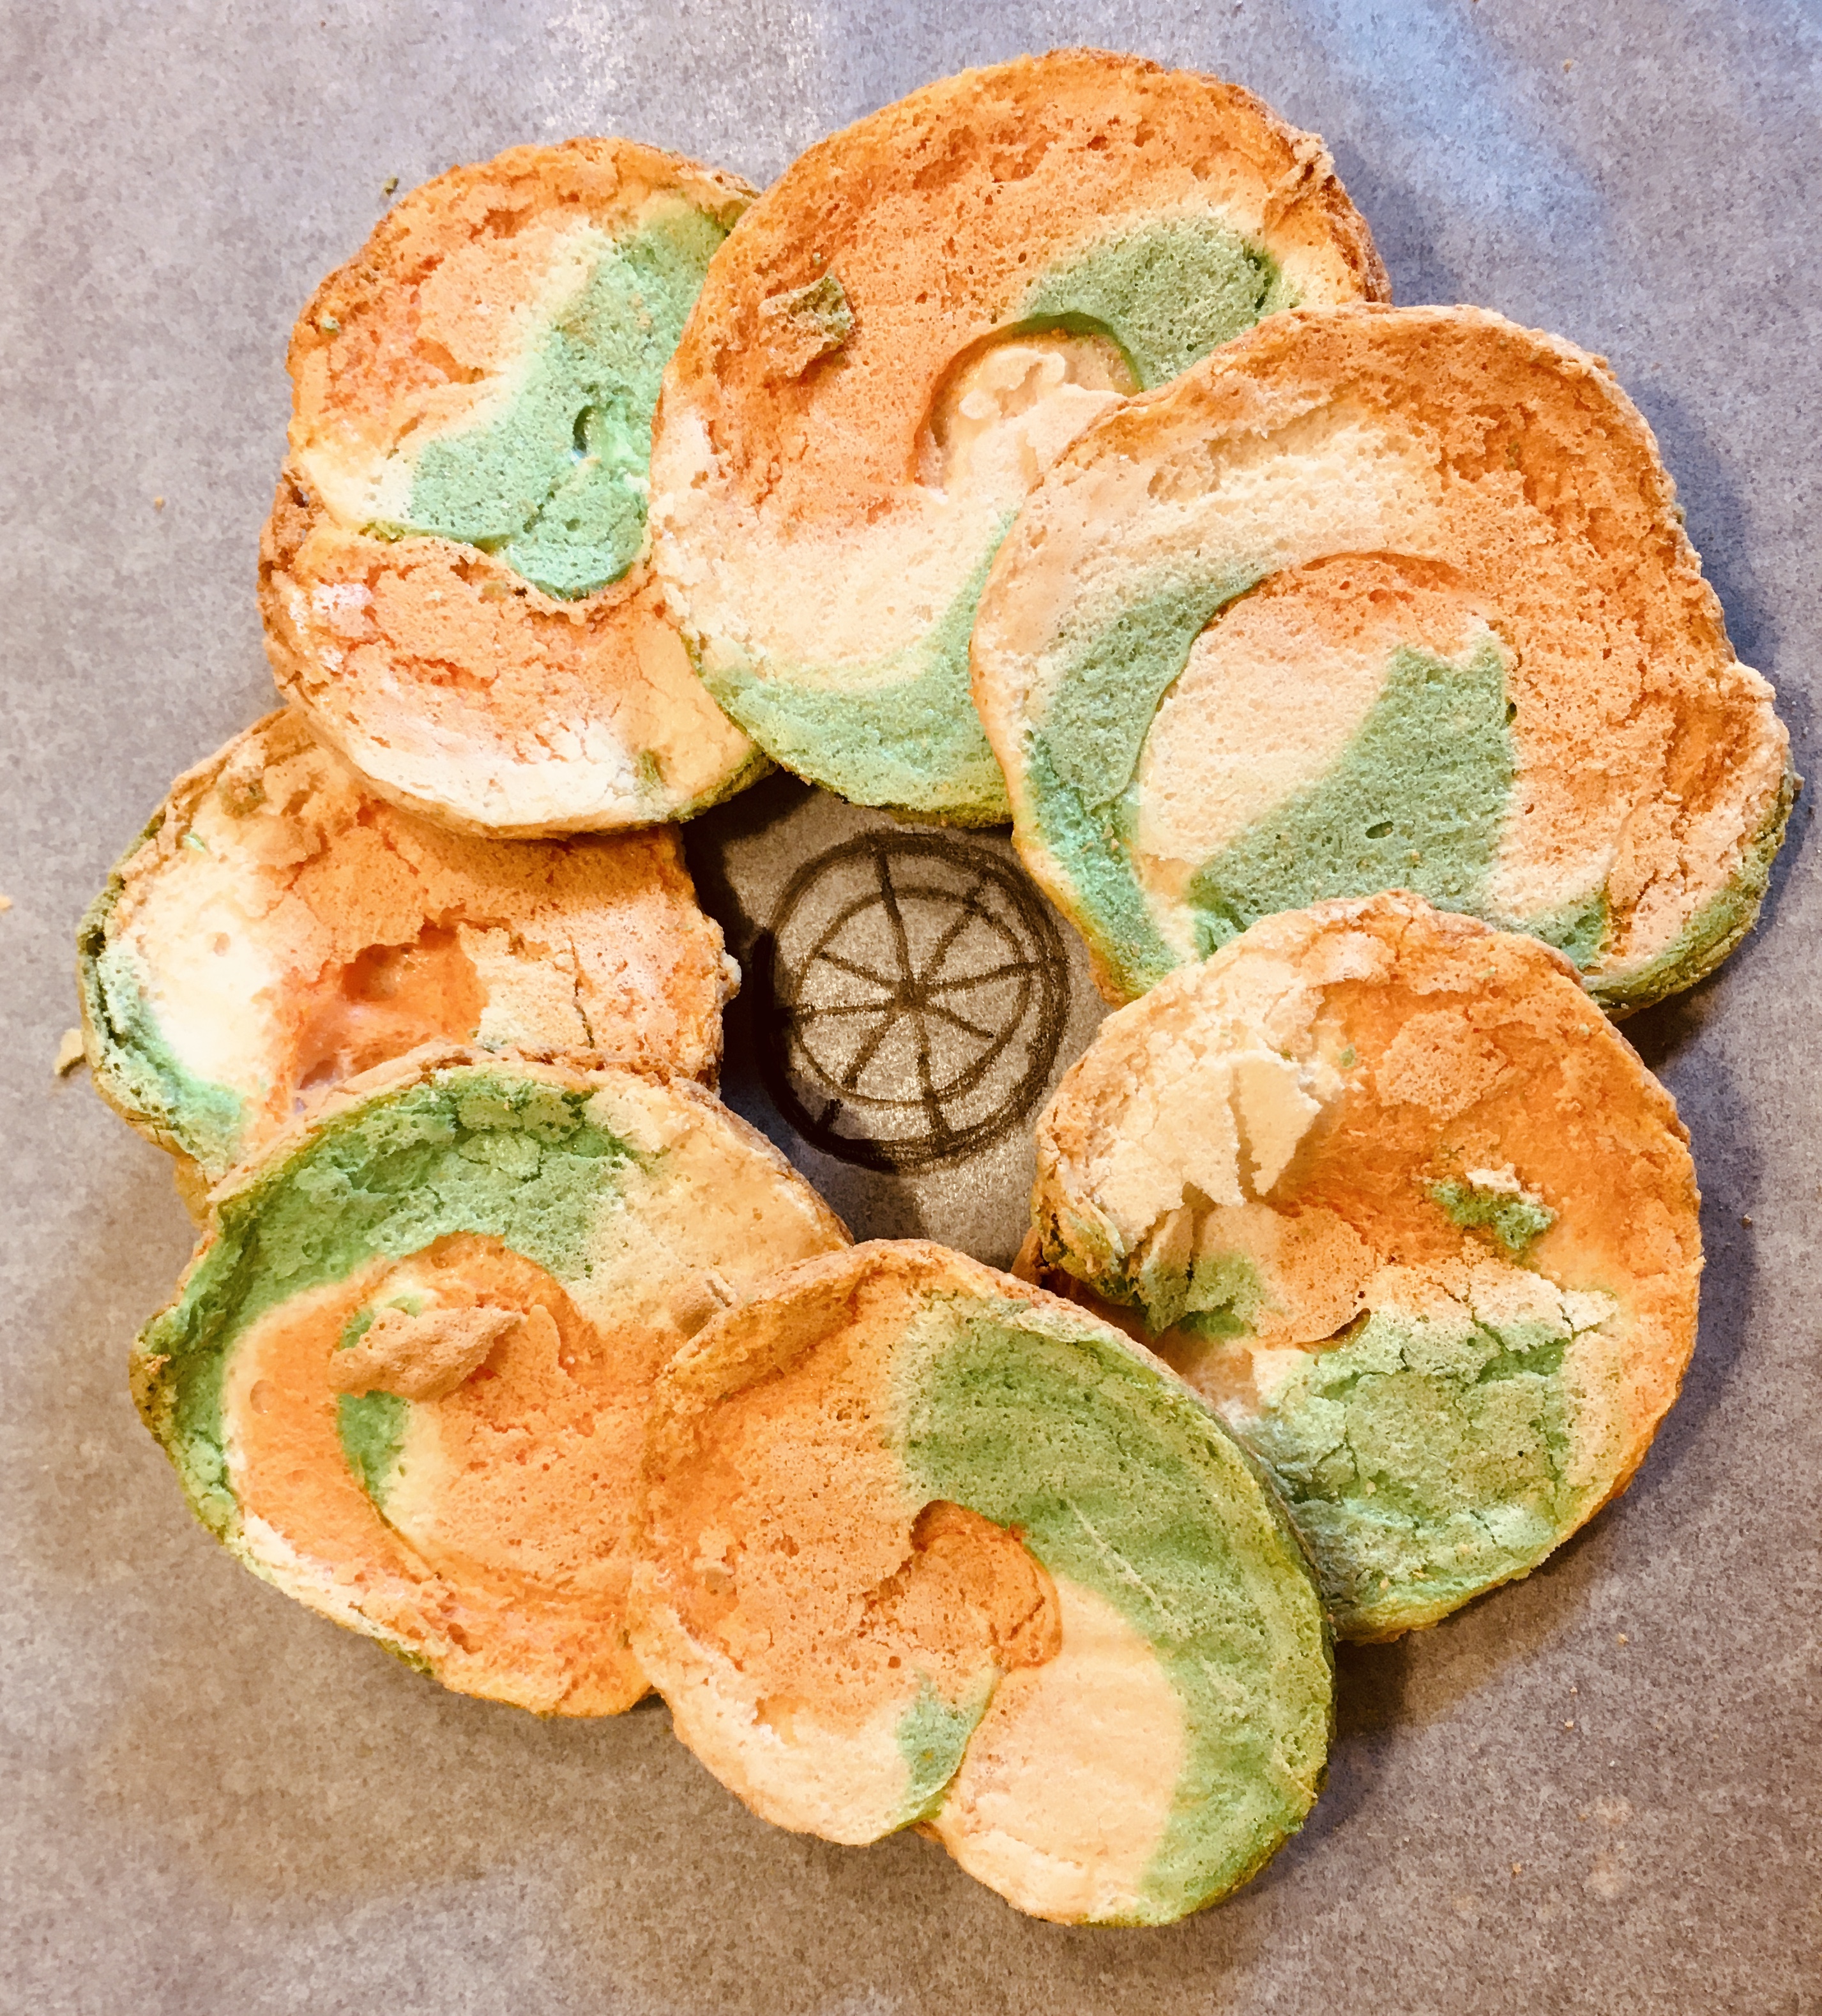
The oven broke midway. There, I said it. Yes, these are not perfectly baked cookies and yes they might be a little more chewy than necessary inside, but I chose to post this recipe anyway. They were alright for around 15 min or so and then the the oven started beeping because it was over heating, and the temperature went up to way beyond 200°F. In fact, the cookies on the middle shelf turned to charcoal in a matter of seconds, so always use the bottom shelf to bake these beauties. Anyway, the only option left was to switch off the oven and leave these cookies in as long as there was heat, and the result was these yummy, delicate cookies with a crisp outside and a chewy interior. Not perfect, but edible.. Of course I will attempt to make these again after my oven is back and post it again.
Notes
- Egg whites should be at room temperature
- Don’t skimp on the sugar, I am already using the minimum amount here
- Make sure the beating bowl and the paddles are all thoroughly clean. Even a slight amount of egg yolk or other fatty impurity will impede the formation of meringue
- Beat the egg whites first and add sugar later.
- Bake at 200°F, open the oven door slightly while baking.
- Organize all the piping equipment and have them ready to use, so that as soon as the meringue is colored, you can start piping immediately.
- You will need
- Electric bench mixer
- Hand mixer
- 3 Spatulas
- 2 tall glasses to fill up the piping bag
- 4 piping bags
- Star piping tip
- Clingwrap
- Silipat mat
- Cookie sheet

Prep time: 30 min
Total time: 2 hrs
Bake time: 1 Hr
Servings: 8
Description
These meringue cookies are gluten free and dairy free, soft on inside and crunchy on outside tea time snacks or desserts. The main ingredient here is the egg white, which makes it a nutritious dessert!
Ingredients
- 5 egg whites at room temperature
- 3/4th cup granulated sugar
- 1/8th tsp cream of tartar
- 1/8 tsp salt
- Clear vanilla extract
- Gel food colors (red, yellow and green)
Method
- Preheat the oven to 200°F
- In a clean bowl separate the egg whites from 5 eggs at the room temperature
- Add in cream of tartar and start beating the egg whites at high until you see the soft peaks (for 4-5 min).
- Add in the granulated sugar in 3 parts and beat at high for another 8 min or so until you can see the stiff, tall and proud peaks when you lift up the beater.
- Divide the meringue into three bowls.
- Add the gel colors of your choice to each bowl. I wanted the saffron color and the green. For saffron, mix 3 drops of yellow + 3 drops of red colors, and for green add 3 drops of green gel. I used the gel colors from Wilton.
- Beat the colors into the meringue using hand mixer and make sure that you wash the beaters between each color.
- Spread a clingwrap onto a flat surface
- Transfer the saffron colored meringue into a piping bag and pipe a long log onto the cling wrap. Make sure the length of the log is less than the length of the piping bag you are going to use finally.
- Use new piping bags to pipe the colored meringue logs on to the same clingwrap. You will end up with the three colored meringue logs next to each other (no spaces in between different colors).
- Seal the clingwrap by bringing the sides together and seal it on one end, such that you enclose the three colored meringues.
- Load this clingwrap (open side first) into a new piping bag with the star tip.
- Use a silipat sheet to pipe the meringue cookies on to the markings on the sheet.
- Place the silipat sheet onto a cookie sheet and bake it in the oven for atleast an hour.
- Switch the oven off after an hour and leave the cookies in there for another half an hour. You can open the oven door a teensy bit, to avoid too much heating while its baking.
- Remove from the oven and enjoy.
Storage
These cookies can be stored in an airtight container in a cool and less humid place. They stay at room temperature for 3 days. I have never had the reason to freeze them, so I am not sure about the freezing protocols.

